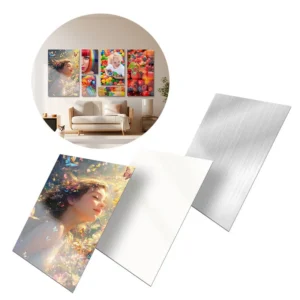

Metal prints are a sleek, modern way to display photography or artwork. With their glossy finish, vivid color, and durable surface, they’re perfect for adding a premium touch to any space. But once you receive your beautiful metal artwork, a question arises—how do you hang a metal print properly?
In this guide, we’ll walk you through exactly how to hang a metal print safely and securely, whether you’re using a float mount, metal brackets, or command strips.
Why Choose a Metal Print?
Before diving into hanging methods, let’s understand why metal photo prints are a favorite:
Sleek, modern aesthetic
Long-lasting and scratch-resistant
Vivid color reproduction
Easy to clean
Perfect for home, office, or gallery displays
Now that you’ve got your print, let’s learn how to mount it.
Tools You May Need to Hang a Metal Print
Depending on the mounting hardware your print comes with, you may need:
Tape measure or ruler
Pencil
Spirit level
Wall anchors or screws
Drill and screwdriver
Command strips (for no-drill mounting)
Hanging wire (optional for gallery mounts)
Common Hanging Methods for Metal Prints
1. Float Mount (Most Common)
A float mount creates a “floating” effect, making the print appear to hover slightly away from the wall.
Steps:
Measure and mark where you want the center of the print to be.
Use a level to ensure your mark is straight.
Drill a screw or use a wall anchor depending on the weight.
Hang the metal print using the attached keyhole or metal hanger.
✅ Tip: For heavier prints, use drywall anchors for more stability.
2. Command Strips (No Damage)
Perfect for renters or those avoiding wall damage.
Some people prefer not to drill holes in walls to avoid damaging surfaces, or they may be renting. In such cases, residue-free adhesive strips are an excellent choice. We recommend using 3M Command Strips.
Steps:
-
Clean the back of the print and the wall with alcohol.
-
Apply command strips to all four corners.
-
Press the print against the wall and hold firmly.
-
Make sure it’s level before letting go.
❗ Note: Only use for lightweight prints under 16×20 inches.
3. French Cleat System
For large or commercial displays.
Steps:
Attach one cleat to the wall and the other to the back of the print.
Interlock the cleats at an angle.
Ensure level and security.
This is one of the most secure ways to hang large metal wall art.
4. Gallery Wire System
For a professional, gallery-style look.
This system uses ceiling or wall-mounted rails with adjustable cables to hang the print.
✅ Best for exhibitions or flexible arrangements.
How to Hang a Metal Print with Magnets
Why Choose a Magnetic Hanging System
Magnetic hanging for metal prints is a modern, damage-free solution that eliminates the need for nails or drilling. It’s especially convenient for renters or anyone who likes to rotate and update their wall art frequently.

Step-by-Step Instructions
Prepare the surfaces – Clean both the back of your metal print and the wall to remove any dust or grease.
Attach adhesive steel plates – If your print doesn’t come with a magnetic back, stick a thin steel plate on the back of the print and another on the wall.
Secure the bond – Press firmly and let the adhesive cure for at least 24 hours.
Mount with ease – Simply bring the print close to the magnetic spot, and it will snap into place. The best part is that you can adjust or swap your prints anytime.
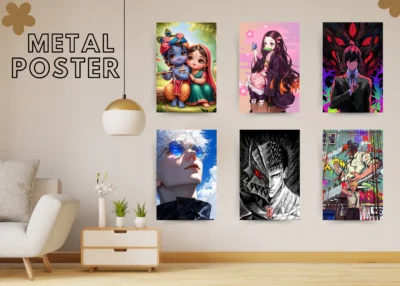
Pro Tip: Modular photo tiles that use magnetic hanging systems are a great way to create a gallery wall you can easily rearrange.
Tips for Perfect Alignment
Use a laser level or traditional level for straight alignment.
Mark both sides of the print location to double-check the balance.
Step back before finalizing the installation to view from a distance.
If hanging multiple metal prints, use a spacing guide or painter’s tape.
Where Should You Hang a Metal Print?
Metal prints are moisture-resistant, making them great for:
Living rooms or bedrooms
Office lobbies or meeting rooms
Kitchens or bathrooms (yes—moisture won’t damage them!)
Hallways or staircases
Outdoor covered spaces
Metal Print Hanging and Production Tips
During Production
Choose the right mounting option: Small metal prints work best with hanger plates, while medium and large sizes often need a sturdy aluminum backframe or float mount.
Support with proper hardware: Options like float mounts, stand-off posts, or inset metal frames not only provide durability but also create a premium gallery-style look.
Prepare your tools: Always have a tape measure, pencil, level, drill, screws, and wall anchors ready. For drywall, using a stud finder will help ensure a secure hold.
Aesthetic & Display Tips
Consider light and finish: Glossy metal prints reflect more light and work best in evenly lit spaces, while matte finishes are ideal in areas with strong sunlight.
Hang at the right height: Aim for about 57 inches from the floor to the center of the print for comfortable viewing.
Plan your layout: For multi-panel displays, cut paper templates and tape them to the wall to preview the arrangement before drilling.
Cleaning & care: Use a soft, lint-free cloth to wipe down your metal prints. Avoid abrasive cleaners that may damage the surface.
By applying these metal print hanging tips, you can ensure your artwork looks professional and lasts for years.
Mistakes to Avoid When Hanging Metal Prints
Relying on weak adhesives – Regular double-sided tape or putty won’t hold heavier prints for long. Always use mounting hardware designed for metal prints.
Drilling directly through the print – This can ruin both the appearance and structural integrity. Stick to mounting systems made for metal prints.
Using the wrong hardware for your wall – Drywall requires anchors or studs; plaster or concrete may need special screws. Always match the hanging method to your wall type.
Ignoring light exposure – Direct sunlight can cause glare on glossy surfaces and may eventually affect the colors.
Skipping measurements – Hanging without careful planning can result in crooked or off-center placement. Always measure and mark before drilling.
Avoiding these common mistakes will save you time and keep your prints looking their best.
FAQ
How do you hang a metal print without damaging the wall?
Use adhesive command strips for lightweight prints or rent-safe display options.
Do metal prints come with hanging hardware?
Most prints come with float mount blocks, keyholes, or metal frames. Always check with your supplier.
Can you hang a metal print with nails?
Yes, but be sure to use proper anchors or hooks to avoid slipping or wall damage.
How much weight can command strips hold?
Usually up to 16 lbs (7.2 kg). Check the product specifications before use.
Do I need to frame a metal print?
No framing is necessary! The modern design of metal prints is meant to be displayed frameless.
Learning how to hang a metal print the right way ensures your art looks professional and stays secure. Whether you’re decorating your home or building a gallery wall, the right mounting method depends on your wall type, print size, and preference for tools vs. no-tools installation.
Choose your method, measure carefully, and enjoy your stunning metal display!